 I love making cakes and biscuits to give to people as a present, so when I saw this idea on Pinterest I couldn’t resist! I thought it was perfect to use as a gift to say thank you when we stayed with some friends and their two girls for the weekend. If you want to find out how to make a picture out of cupcakes,
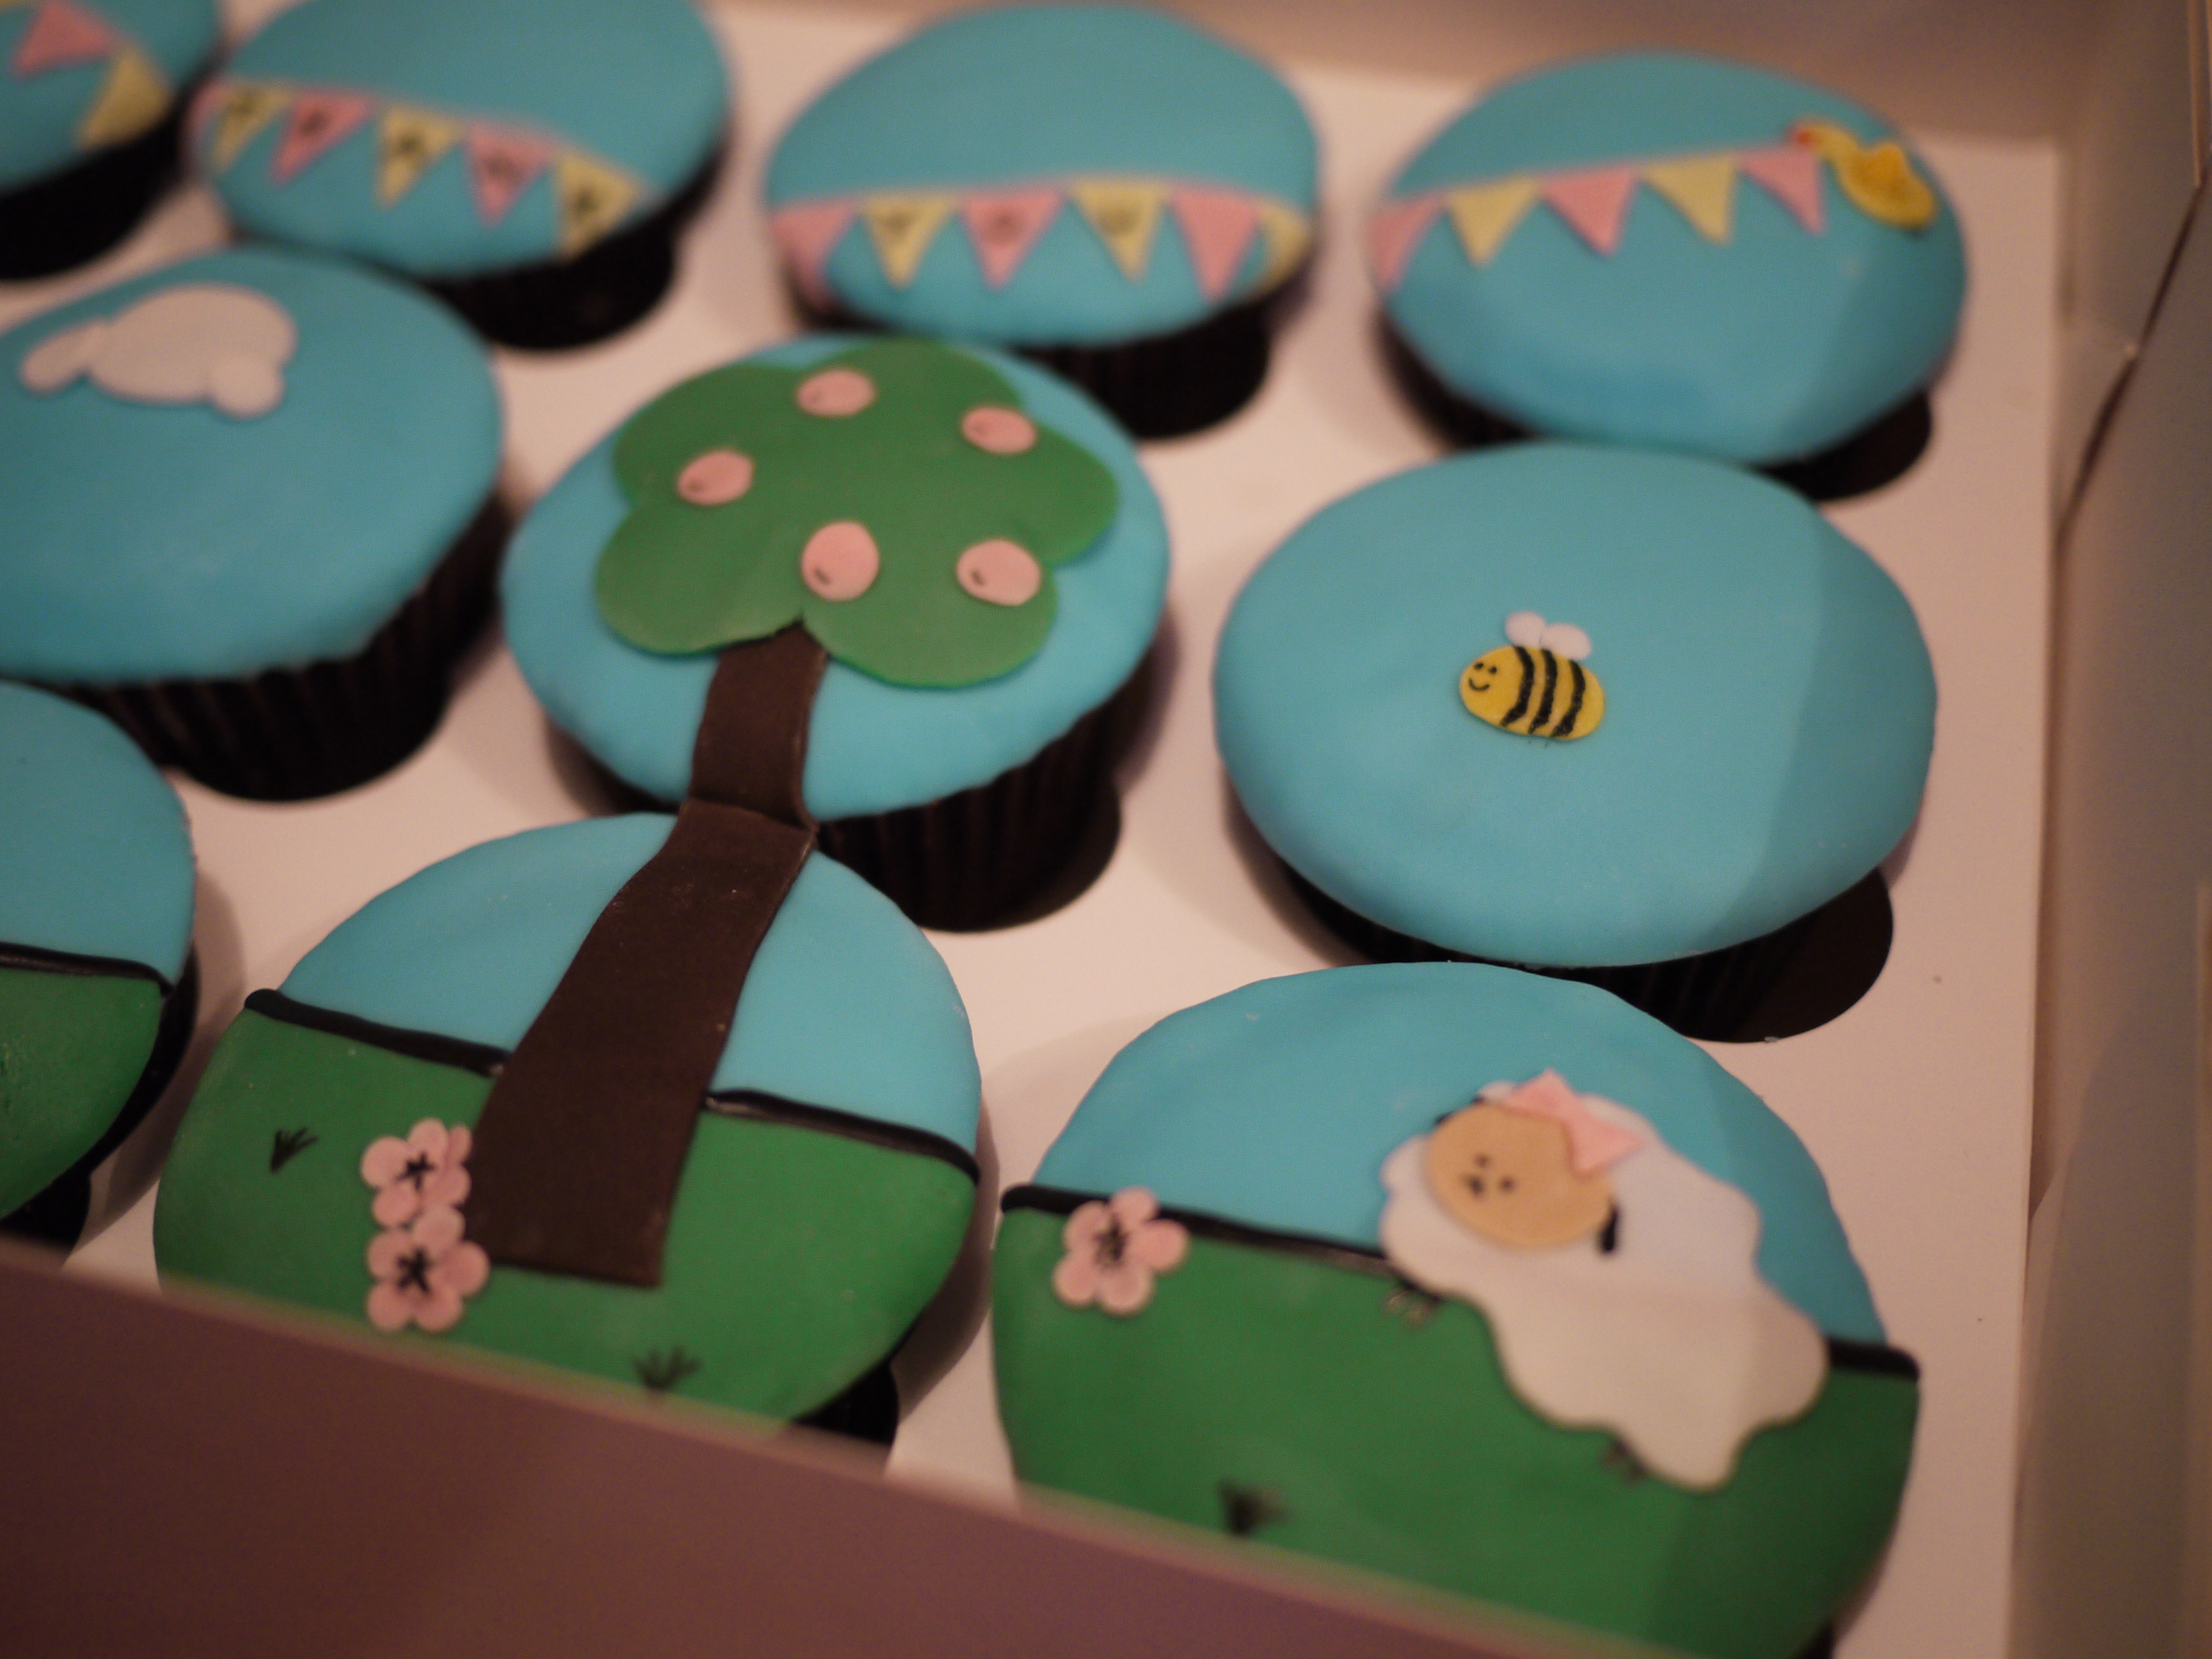
I had a lot of fun making these and would definitely do something similar again. The girls loved them, as did the adults and as usual they didn’t last long! The decorations were relatively simple to do and would be easily adaptable to make any picture of your choice. You could use any flavour cupcake, I chose hot chocolate ones as they are always popular, you can find the recipe here.
 Here are some instructions on how to decorate the cakes:
- Take a batch of 12 cupcakes (any flavour) and cover with butter cream to create a rounded top on each one. Leave to chill for a bit so that it hardens up.
- In order to secure all the pieces of fondant in place when making this picture, you will probably need to very lightly brush/dab with water so that the fondant bonds to the fondant below.
- Colour enough fondant sky blue to cover the tops of 12 cupcakes. Roll out to about 3mm thick and cut out 12 large circles. Place one on top of each cupcake and smooth into place to make a dome.
- Next, colour some fondant grass green and roll out to about 2-3mm, cut 2 circles the same size as the blue ones and cut them in half. Take 4 of the cupcakes and place the green semi-circles on top to form the grass. You can either pipe a black line or roll out a thin line of fondant to make a neat black edge to the grass.
- Colour a small amount of fondant brown, roll out and cut it to size to make the tree trunk, a small amount goes on one cupcake and the bottom of the trunk needs to be stuck onto one of the cakes with the grass on.
- Use any remaining green fondant to make the green top for the tree, roll it out and cut it into a tree top shape just big enough to fit on top of a cupcake, secure in place on the cupcake that you stuck the top of the tree trunk on.
- Next with white fondant, roll out a small piece and cut out 3 small shapes for the sheep’s bodies. Stick these onto 3 of the cupcakes that have the grass on.
- While you are using the white fondant, cut 2 larger circles (about 1.5cm in diameter) 1 medium circle (1cm) and 6 small circles (0.5cm) to make the clouds. I usually use round piping nozzles for these. Arrange the clouds as in the photo onto 3 of the cakes.
- To make the little birds, colour a small amount of fondant yellow, roll out the fondant and cut 2 medium sized circles for the bodies and 2 smaller circles for the heads. Also cut two small tear shapes to make the wings for one of the birds. The wing of the bird on the right is just a small amount of fondant rolled into a pyramid.
- From the remaining yellow fondant, cut a small oval for the bee and 2 small white circles for the wings. Add the black detail with an edible pen.
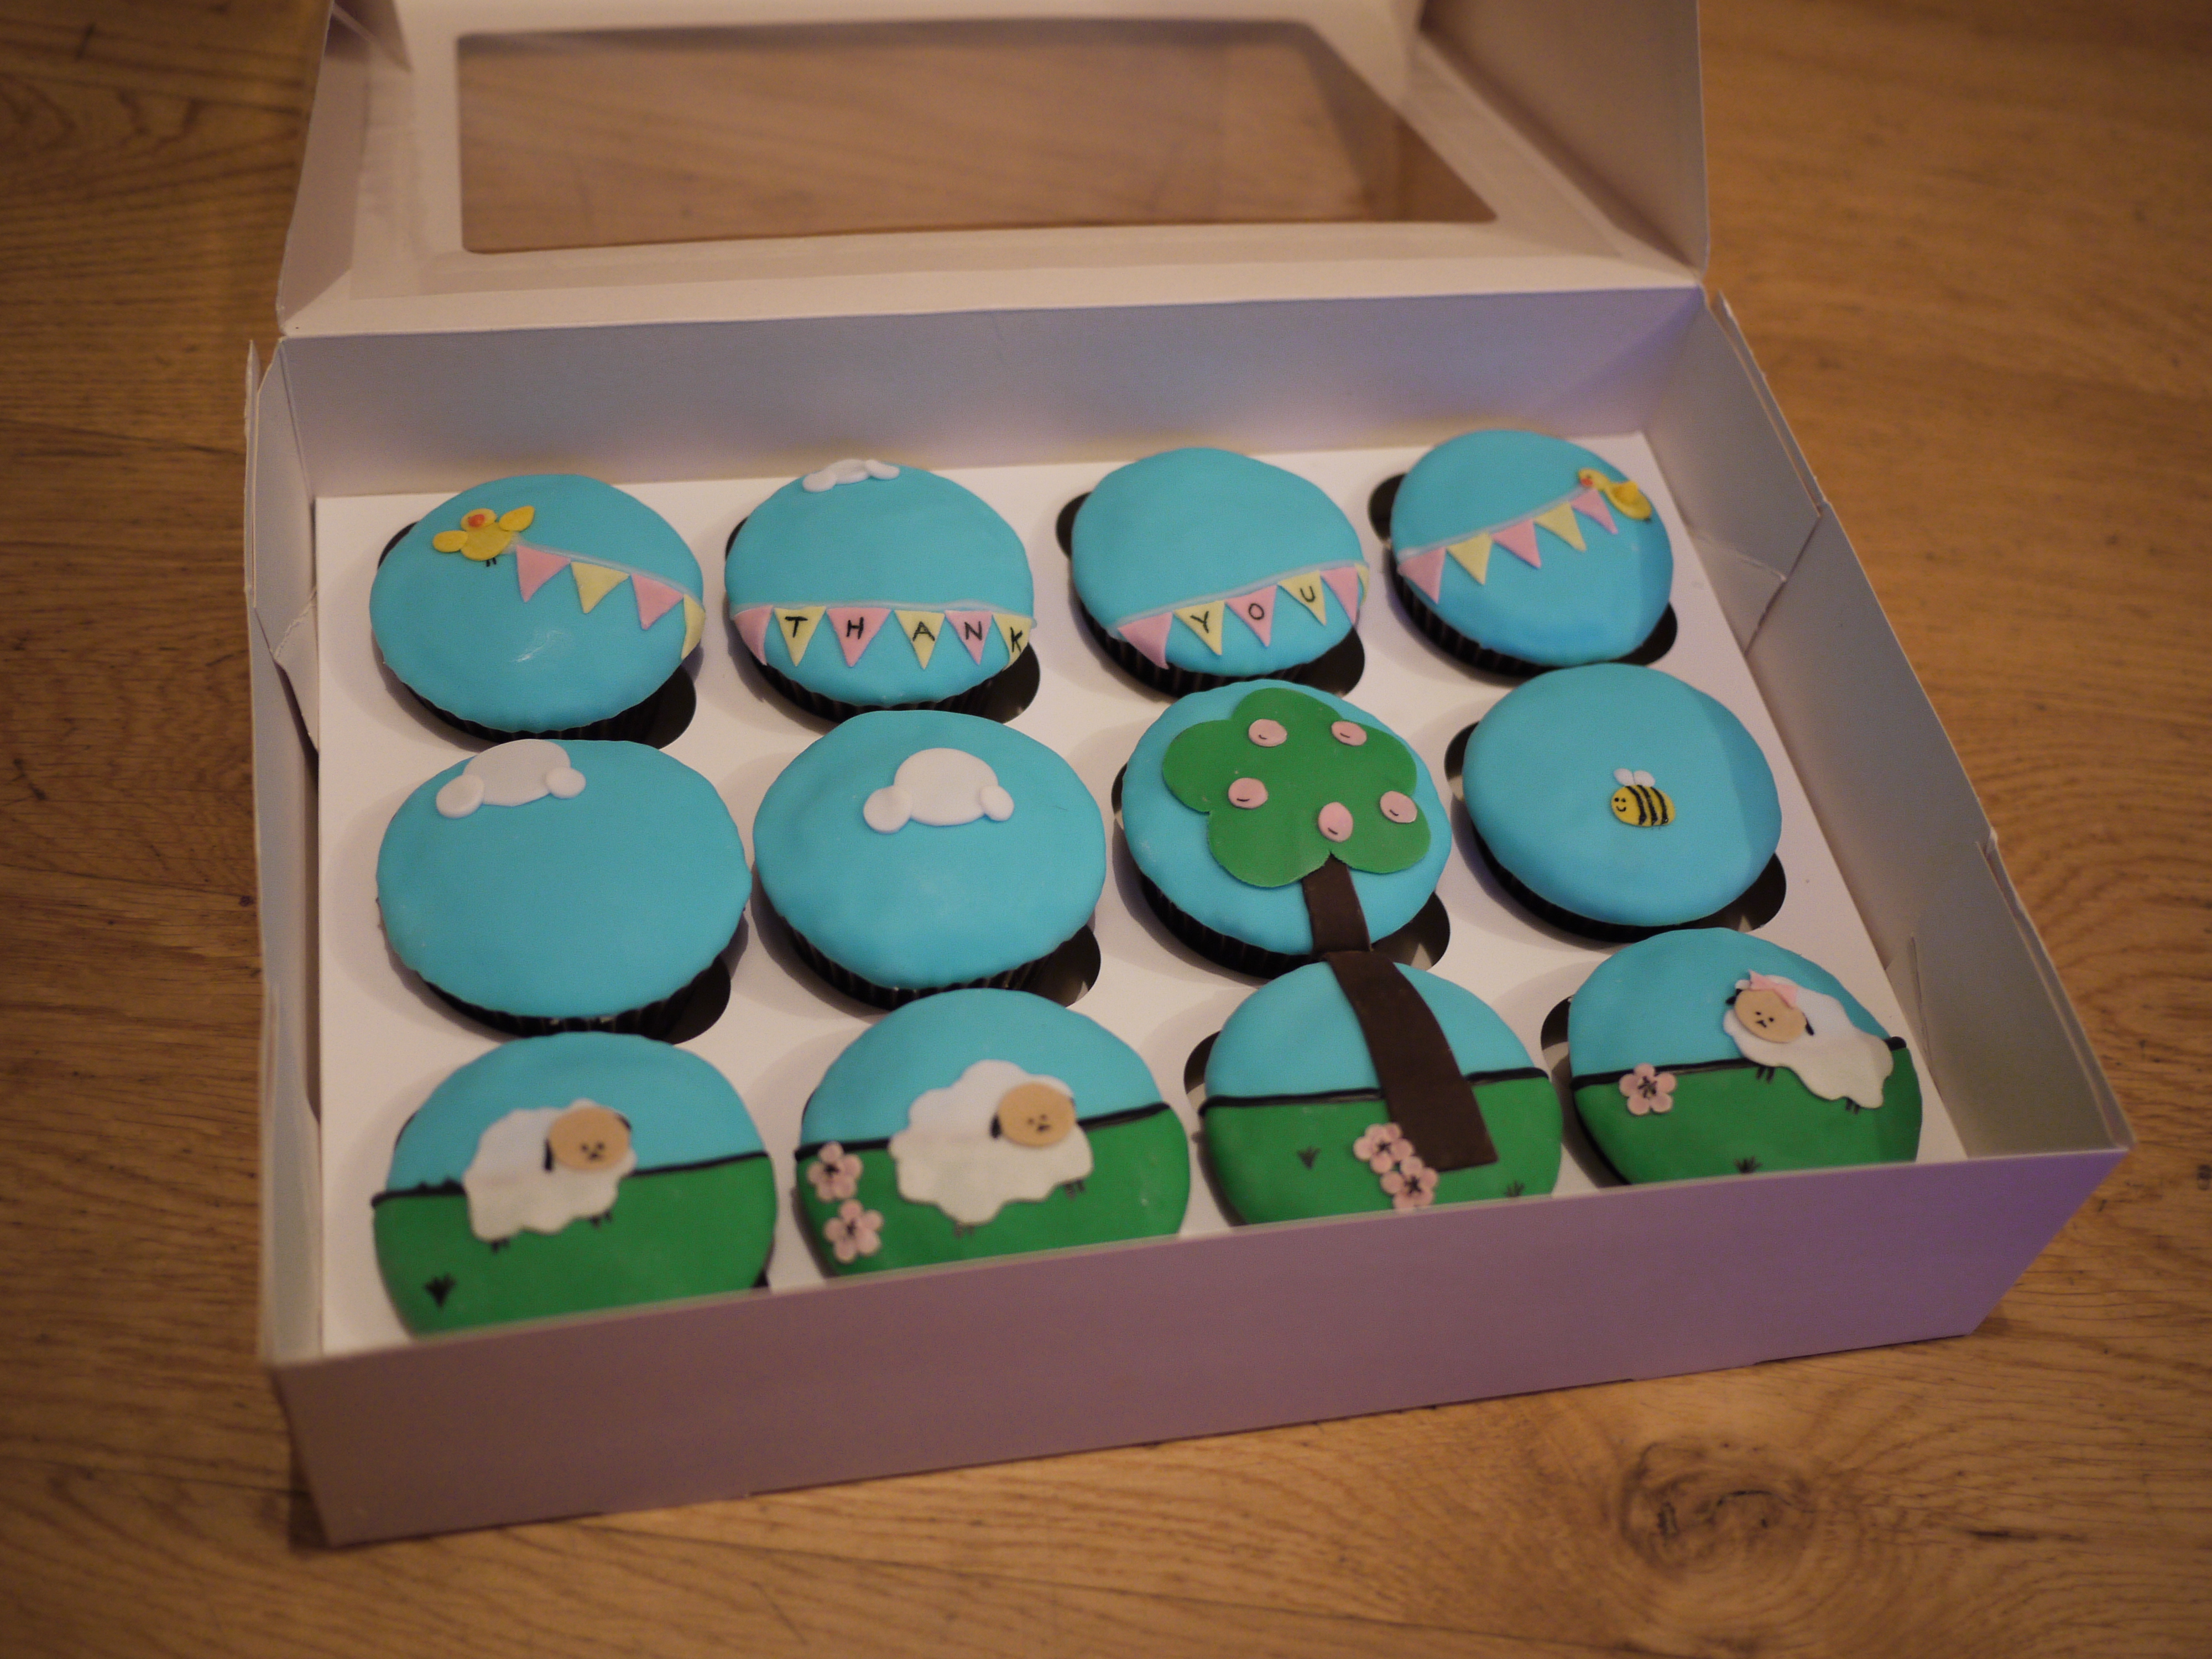
- Add some extra white to the remaining yellow to make it slightly paler for the bunting. Make some pale pink too. Roll out and cut out 12 little triangles in each colour (you may need a few more or less depending on the size of your cakes). Arranged the triangles to form the bunting on the relevant cupcakes (the two with the birds, one with the cloud at the top and one plain blue one) and either with white icing or a thin roll of fondant make the string of the bunting.
- With the rest of the pink, use a cutter to cut out a few flowers and cherries for the tree and a bow for one of the sheep.
- Add any remaining details with an edible black pen to complete the look.
- Arrange in a 4×3 12 hole cupcake box to form the picture.


Leave a comment