 Last Christmas Tom gave me some great presents. One of them was a “Hello Cupcake” calendar. I have the Hello, Cupcake! and What’s New Cupcake? books and I love the fun ideas in them…. and the calendar has 12 new ideas for me to try! So I have decided that each month I will make the cupcakes for that month. January’s cupcakes were shoes, which I’d already made in December (got a bit ahead of myself there – maybe I’m psychic?!) so the first ones to make were the ones for February. Could you eat a dragon?

I’m guessing that “Year of the Dragon”, as they are called, should have been made last weekend to celebrate Chinese New Year, especially since it’s now year of the Snake. So when my friend Ro asked me over for dinner, I thought it was the perfect opportunity to make these for pudding. I made the decorations out of white chocolate modelling paste. How have I never discovered chocolate modelling paste before?! It’s pretty easy to make, can be coloured and is perfect for cutting out shapes like the ones for this dragon. And the best bit is, it tastes so much better than fondant icing!
 In order to make these you will need the following:
- 14 cupcakes topped with buttercream – I made vanilla (recipe here). You could make more or fewer depending on how long you want your dragon to be.
- 300g white chocolate modelling paste (see recipe below)
- red, yellow and green gel food colouring
- a tiny amount of white fondant icing
- a small amount of royal icing (for sticking things together!)
- 2 green Smarties, 2 brown Smarties and 8 yellow Smarties (or more if you’re making a longer dragon)
- 1 wafer ice cream cone
- 1-2 tablespoons granulated sugar
- 2 Oreos, one side removed from each
White Chocolate Modelling Paste
300g white chocolate, chopped
4 tbsp golden syrup
Melt the white chocolate in the microwave. Gently warm the golden syrup so it’s the same temperature as the melted chocolate. Stir the golden syrup into the white chocolate – it will stiffen but keep stirring. Leave to cool slightly then knead with your hands. Add food colouring at this point if you want to – I divided it into 3 and coloured each with yellow, red and green.
I found the best way to roll it out was between 2 pieces of greaseproof paper or plastic sheets.
To Make a Chinese Dragon
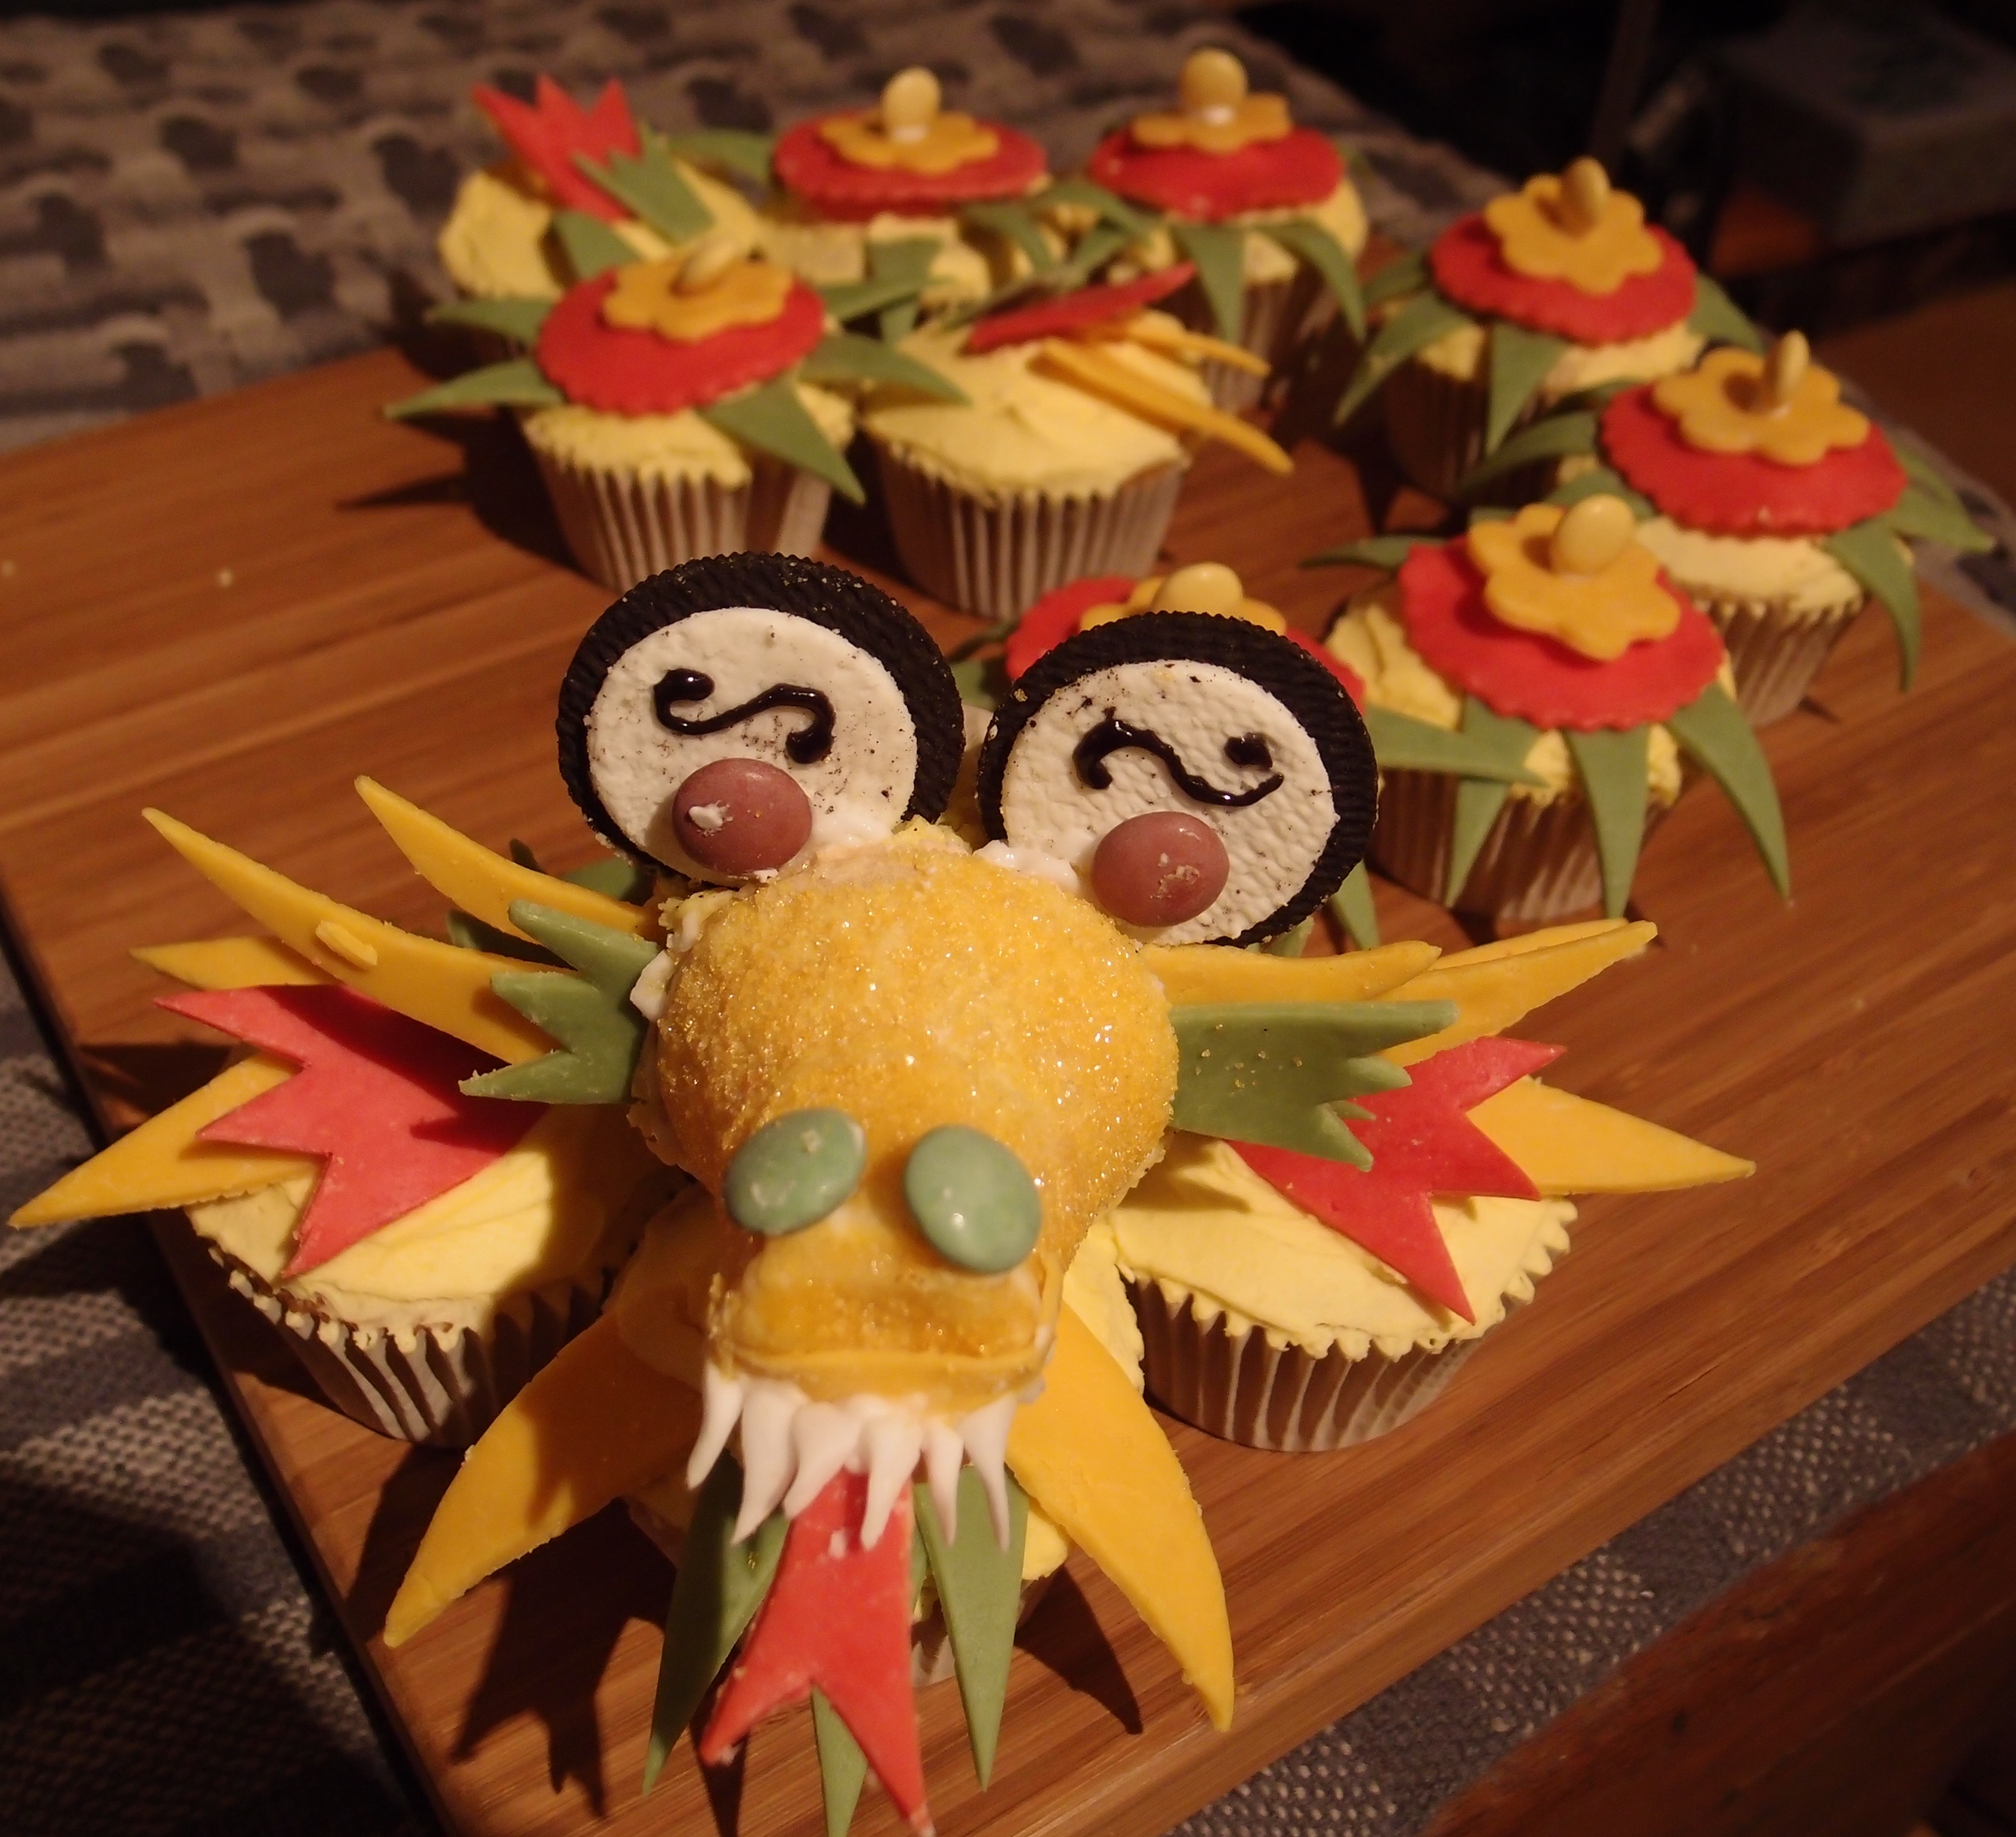
Roll out the red chocolate modelling paste and cut out 8 circle with a fluted edged cutter. Cut out the 4 shapes for the feet and a tongue.
Roll out the yellow modelling paste and cut out 14 shapes for the feet and head (look at the photos to see what shapes are needed). Cut out 8 small flower shapes for each body segment.
Roll out the green modelling paste and cut out 45 triangle (6 for each body segment and 3 for the chin), and 6 of the shapes for the feet and face.
Take 8 cupcakes and stick 3 green triangles of modelling paste into each side of the buttercream. Top each one with a red circle and then a yellow flower shape. Finally use a small amount royal icing to stick a yellow Smartie into the middle of each one.
Take 4 cupcakes and stick 2 yellow pieces of modelling paste into the buttercream, followed by 2 red shapes and then 2 green shapes.
Take 1 cupcake and stick 3 green triangles and 2 yellow ones into the buttercream (this is for the chin).
Stir a couple of drops of yellow food colouring into the granulated sugar. Cover the ice cream cone with a thin layer of royal icing and then roll in the coloured sugar. Using a bit of royal icing stick 2 green Smarties onto the end of the cone for nostrils. Stick a small strip of yellow modelling paste onto the end of the nose and stick the tongue underneath. Stick a few triangle of fondant icing under the strip and on top of the tongue as teeth.
Take the final cupcake and stick 2 yellow pieces of modelling paste into each side and 1 green shape into each side. Push the 2 Oreos into the top – you made need some royal icing to help these stick. Stick a brown Smartie onto each and then draw some eyebrows on with a bit of brown or black royal icing. Then with some royal icing, stick the cone onto the cupcake.
Arrange the cupcakes as shown in the photos – place the “head” on it’s side and keep in place with some cocktail sticks.

FANTASTIC!!!!!
thank you! xxx