
Since discovering that we have tawny owls living in the woods near us, I have found a new love for these gorgeous birds. They make the most amazing mystical “twit twoo” sound which we hear most evenings. So it seems very appropriate to blog about these cute little owl cupcakes.
These were very simple to do and could be done in any colour scheme. I chose red and white because I had made red velvet cupcakes. You can find the recipe here. Although cutting out all the individual bits took a bit of time, once that was done, they were very easy to put together. I baked 6 cupcakes in red cases and 6 in ivory.

Here’s what I did:
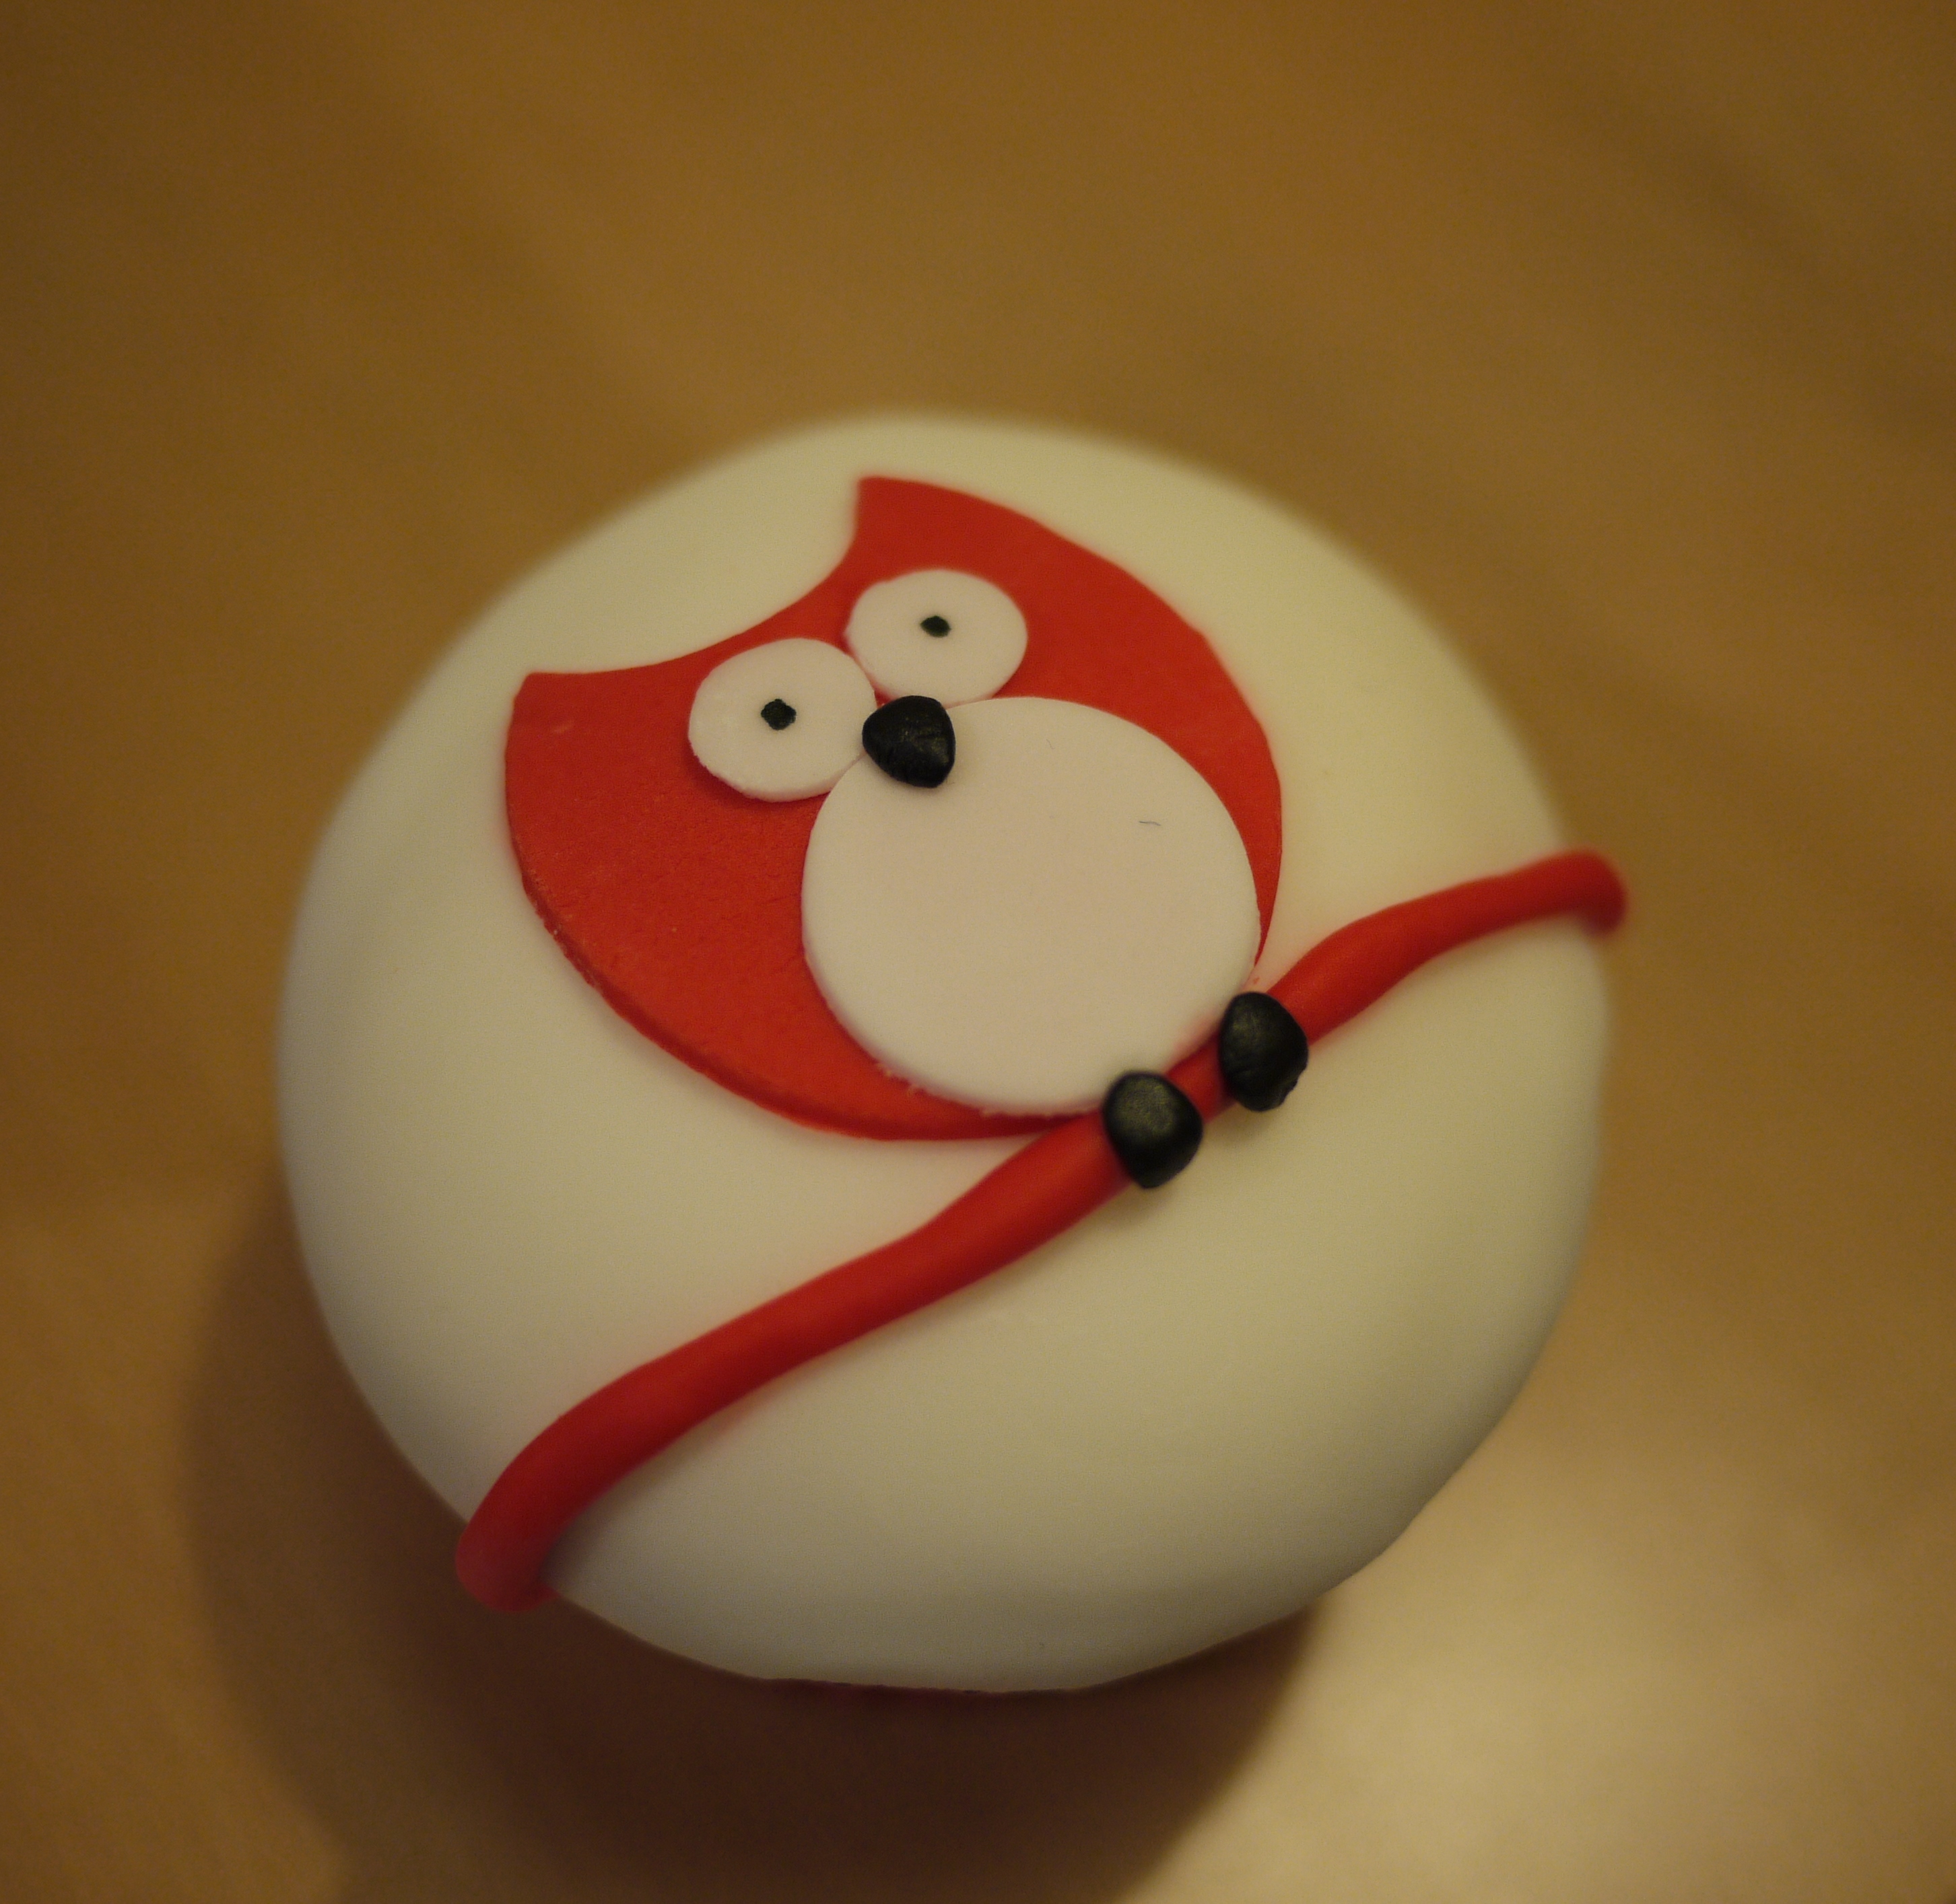
- I used a large round cutter (about 1cm wider than the top of the cupcake) to cut out 12 circles, 6 from red fondant and 6 from white fondant and use this to cover the top of each cupcake, secured in place by dampening and then smoothing with the palm of your hand. I used the opposite colour fondant to the cupcake case.
- I used a small round cutter (around 3cm) to cut 12 circles , again, 6 red and 6 white, these are for the owls bodies. Using the fat end of a piping nozzle, I then cut a semi circle out of the top of each circle for the top of the owls head.
- I used the fat end of a piping nozzle to cut 6 red and 6 white circles for the owls chests.
- I used the thin end of a Wilton no. 5 piping nozzle to cut 12 small circles out of both the red and white fondant.
- Next I rolled out some long strips of red and white fondant to use for the branches.
- Using black fondant I made 12 small triangle shapes for the beaks and 24 oval shapes for the claws.
- To assemble them, following the colour scheme I used the larger circle in the opposite colour to the top of the cupcake and dampened to secure in place. I then used the opposite colour to the owls body for the chest and eye circles and dampened to stick in place. Ensure that the owls bodies are placed in different positions, 4 in the centre, 4 to the right and 4 to the left.
- Using the long strip of fondant in the same colour as the owls body I placed a slightly wobbly strip for the branch onto the top of each cupcake.
- Next I secured the beak and claws in place by dampening slightly with water using a paint brush.
- Using an edible ink pen I marked the black dots on the eyes. For the owls with their bodies in the centre, their eyes were also in the centre. For the ones with their bodies on the left, I placed the dots of their eyes over to the right and vice versa for the owls positioned on the right.
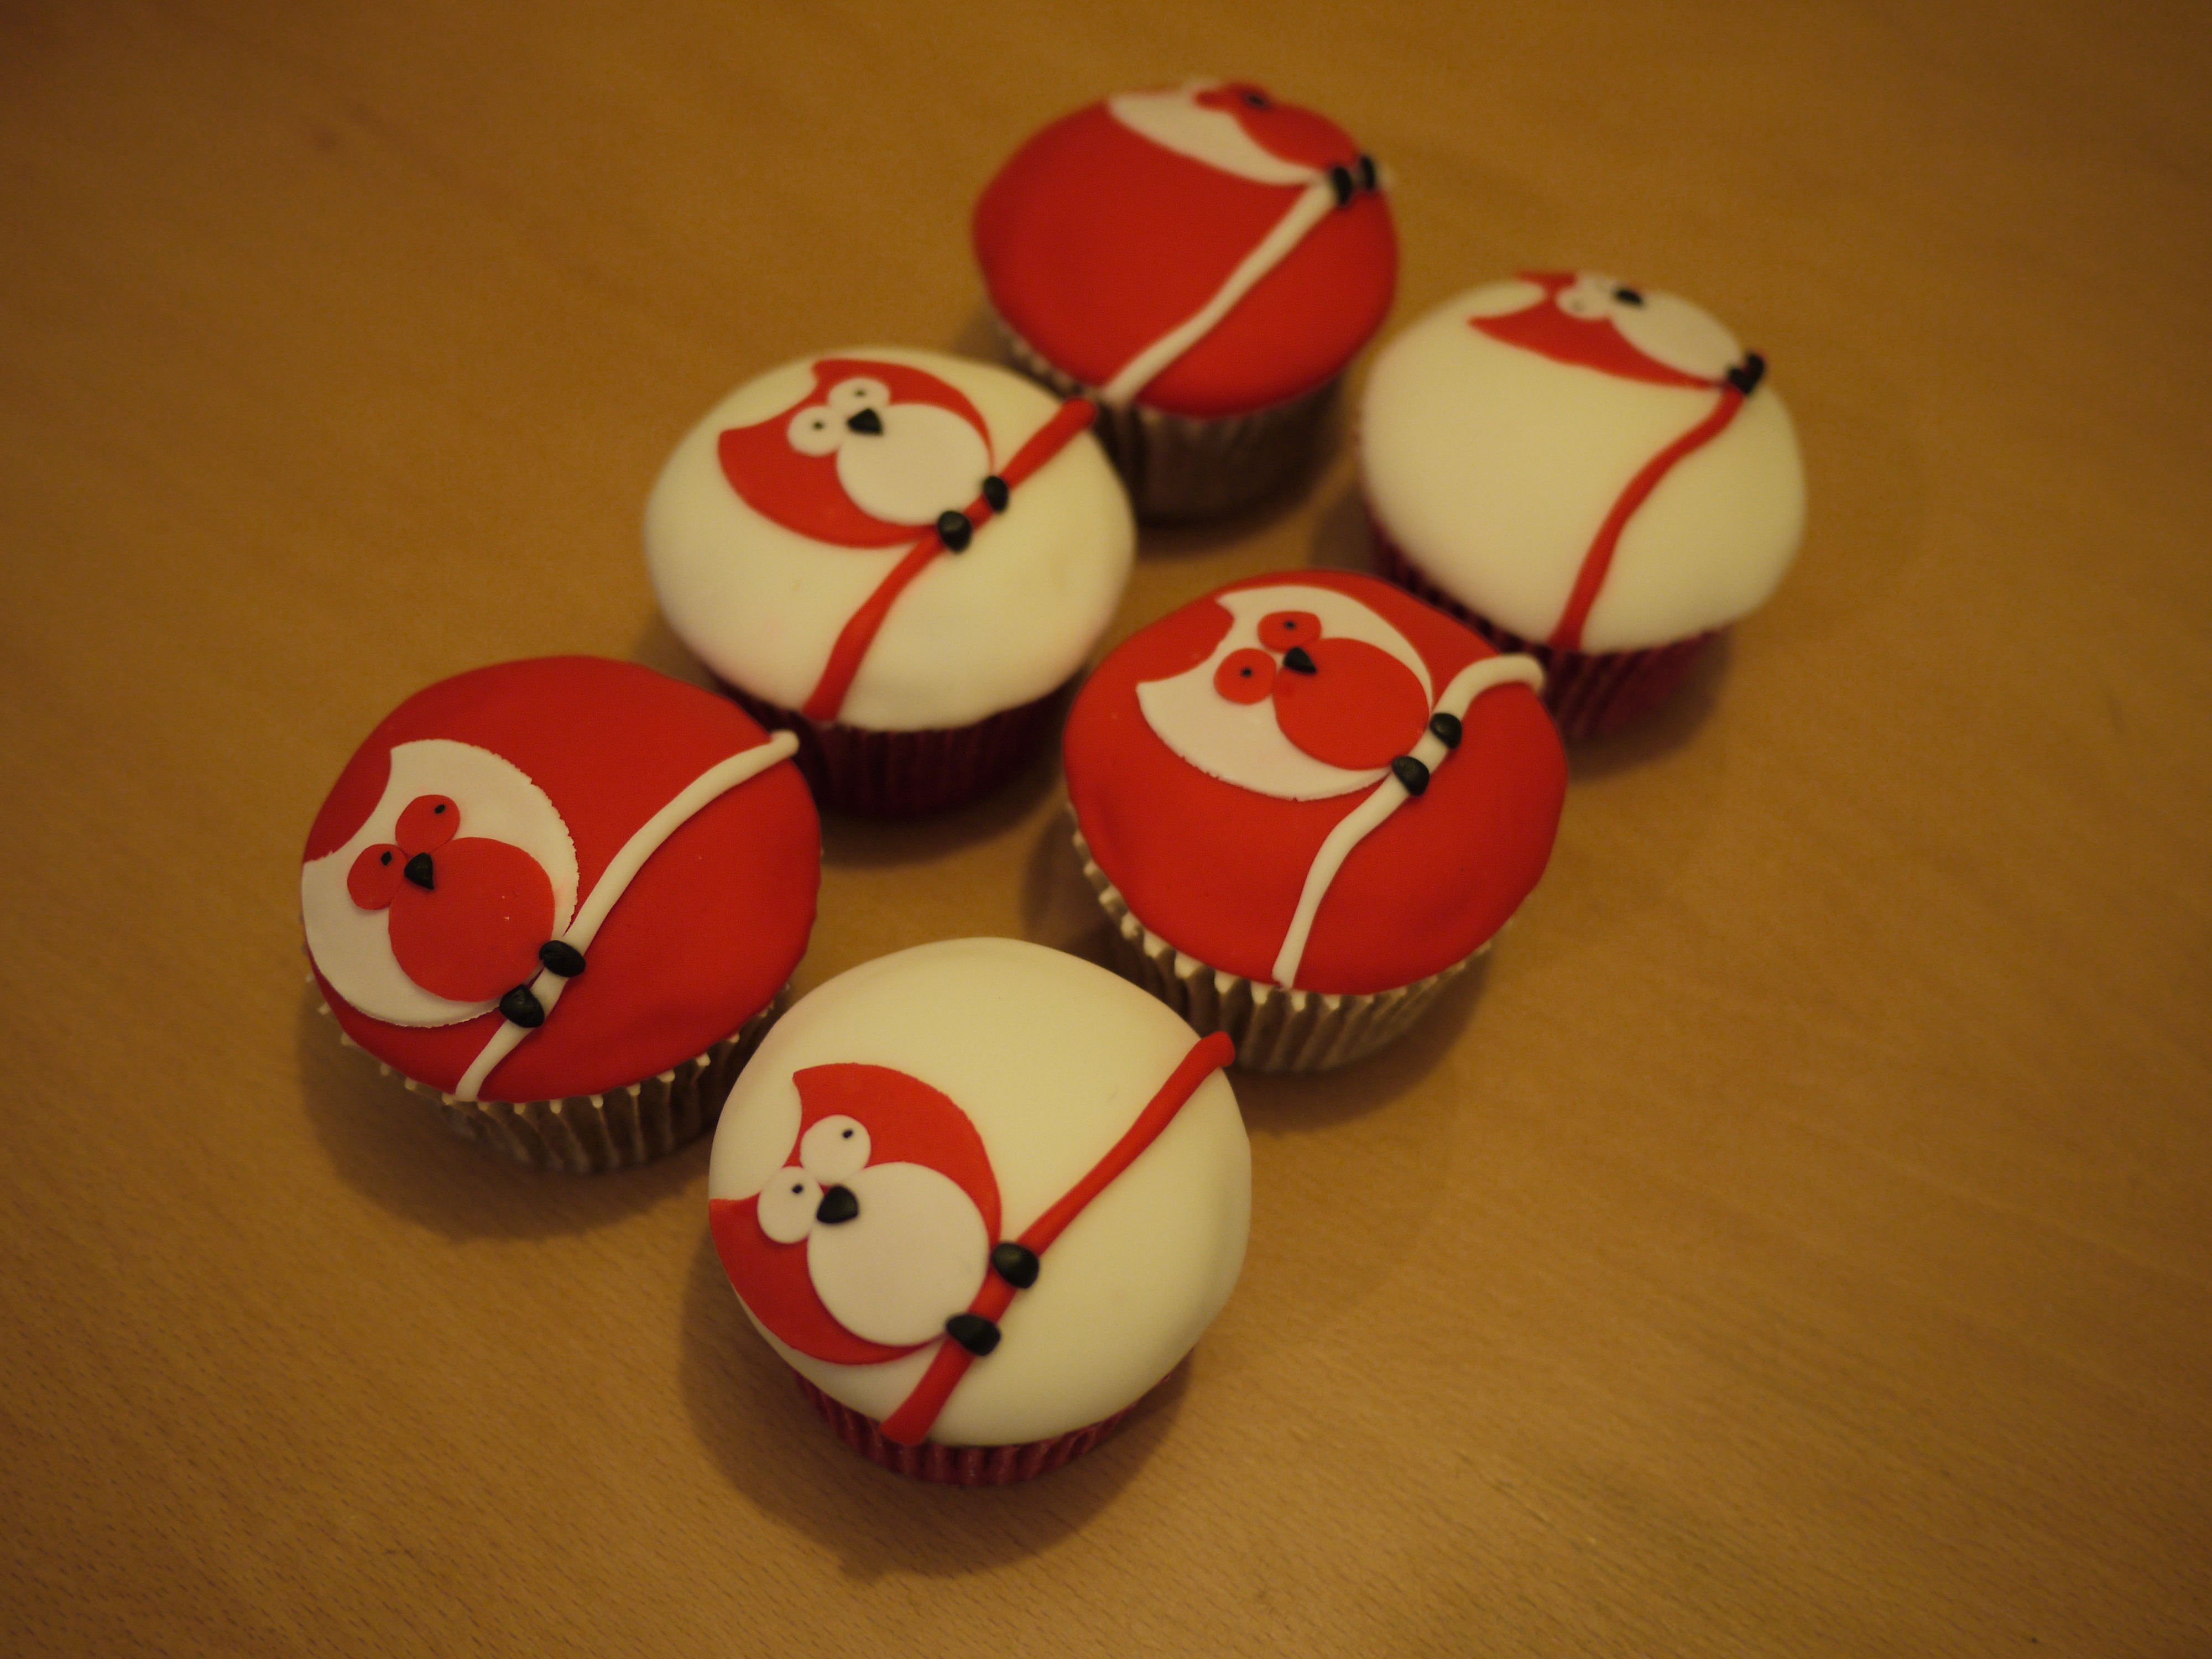
The design is simple but effective, I’ll definitely be making more of these gorgeous little owls again soon!

How cute is that!! 🙂
Thanks!