
This year I really wanted to practise my piping skills, so I decided that rather than making a conventional gingerbread house I would take my inspiration from Eastern Europe. Some of the gingerbread creations made there are truly incredible and the level of detail is exquisite.

I used the gingerbread recipe we’ve used in the past as I love the treacly flavour and it bakes really well, you can find it here. For the base I used self raising flour to get a slight rise and the puffed rounded edges. For the houses and trees I used plain flour as I wanted them to hold their shape.

Now it’s time to get creative! I used some thin cardboard to cut out templates for all the pieces I was doing, including the base. I found the best way to cut the shapes from the gingerbread dough accurately was to roll out the gingerbread between two layers of grease proof paper (I find that peeling off the grease proof paper and re-laying it every few rolls helps to stop it sticking) to about 5mm thick and then place it on a tray (still between the grease proof paper) and pop it in the freezer. Once it is frozen it is solid and much easier to cut around your templates and transfer to a baking tray without it loosing it’s shape. You have to work quite quickly as it thaws out pretty fast.
Once you have cut out your shapes and put them on a baking tray place in the fridge or freezer to chill before baking. This helps it hold its shape.
For the base I cut out holes for the tea lights using the metal bit of the tea lights after removing the candle. I baked it in the oven with the metal case in place so it held it’s shape.

Once baked and completely cooled you can then begin icing it. To make the royal using I used a ratio of 1 large egg white and 225g icing sugar. This is suitable for use with a Wilton no. 1.5 and no. 2 piping nozzle to do all the outlines for the base. For the outlines of the houses I added about half a teaspoon of water to the icing and used a Wilton no. 1 nozzle. I also used the Wilton no.1 nozzle for the hearts. These took some time to do – about 20 mins per heart – but it’s worth taking the time over them. It took me a while to get the consistency of the icing perfect and the amount in the piping bag just right too, but after several attempts (some too thick, some too thin and some with the piping bag too full) I managed to get the right combination. Once the hearts had dried out I threaded some cotton through them ready to hang up.

Once all the outlines had dried I then filled in the roofs by thinning down the icing with a touch more water to make it a bit runnier. You really don’t need to add much water though, it needs to be just runny enough that it spreads to fill the template with a bit of gentle guiding into the corners with the end of the nozzle and so the lines created by the nozzle disappear as it spreads. I used a Wilton no.3 nozzle for this.
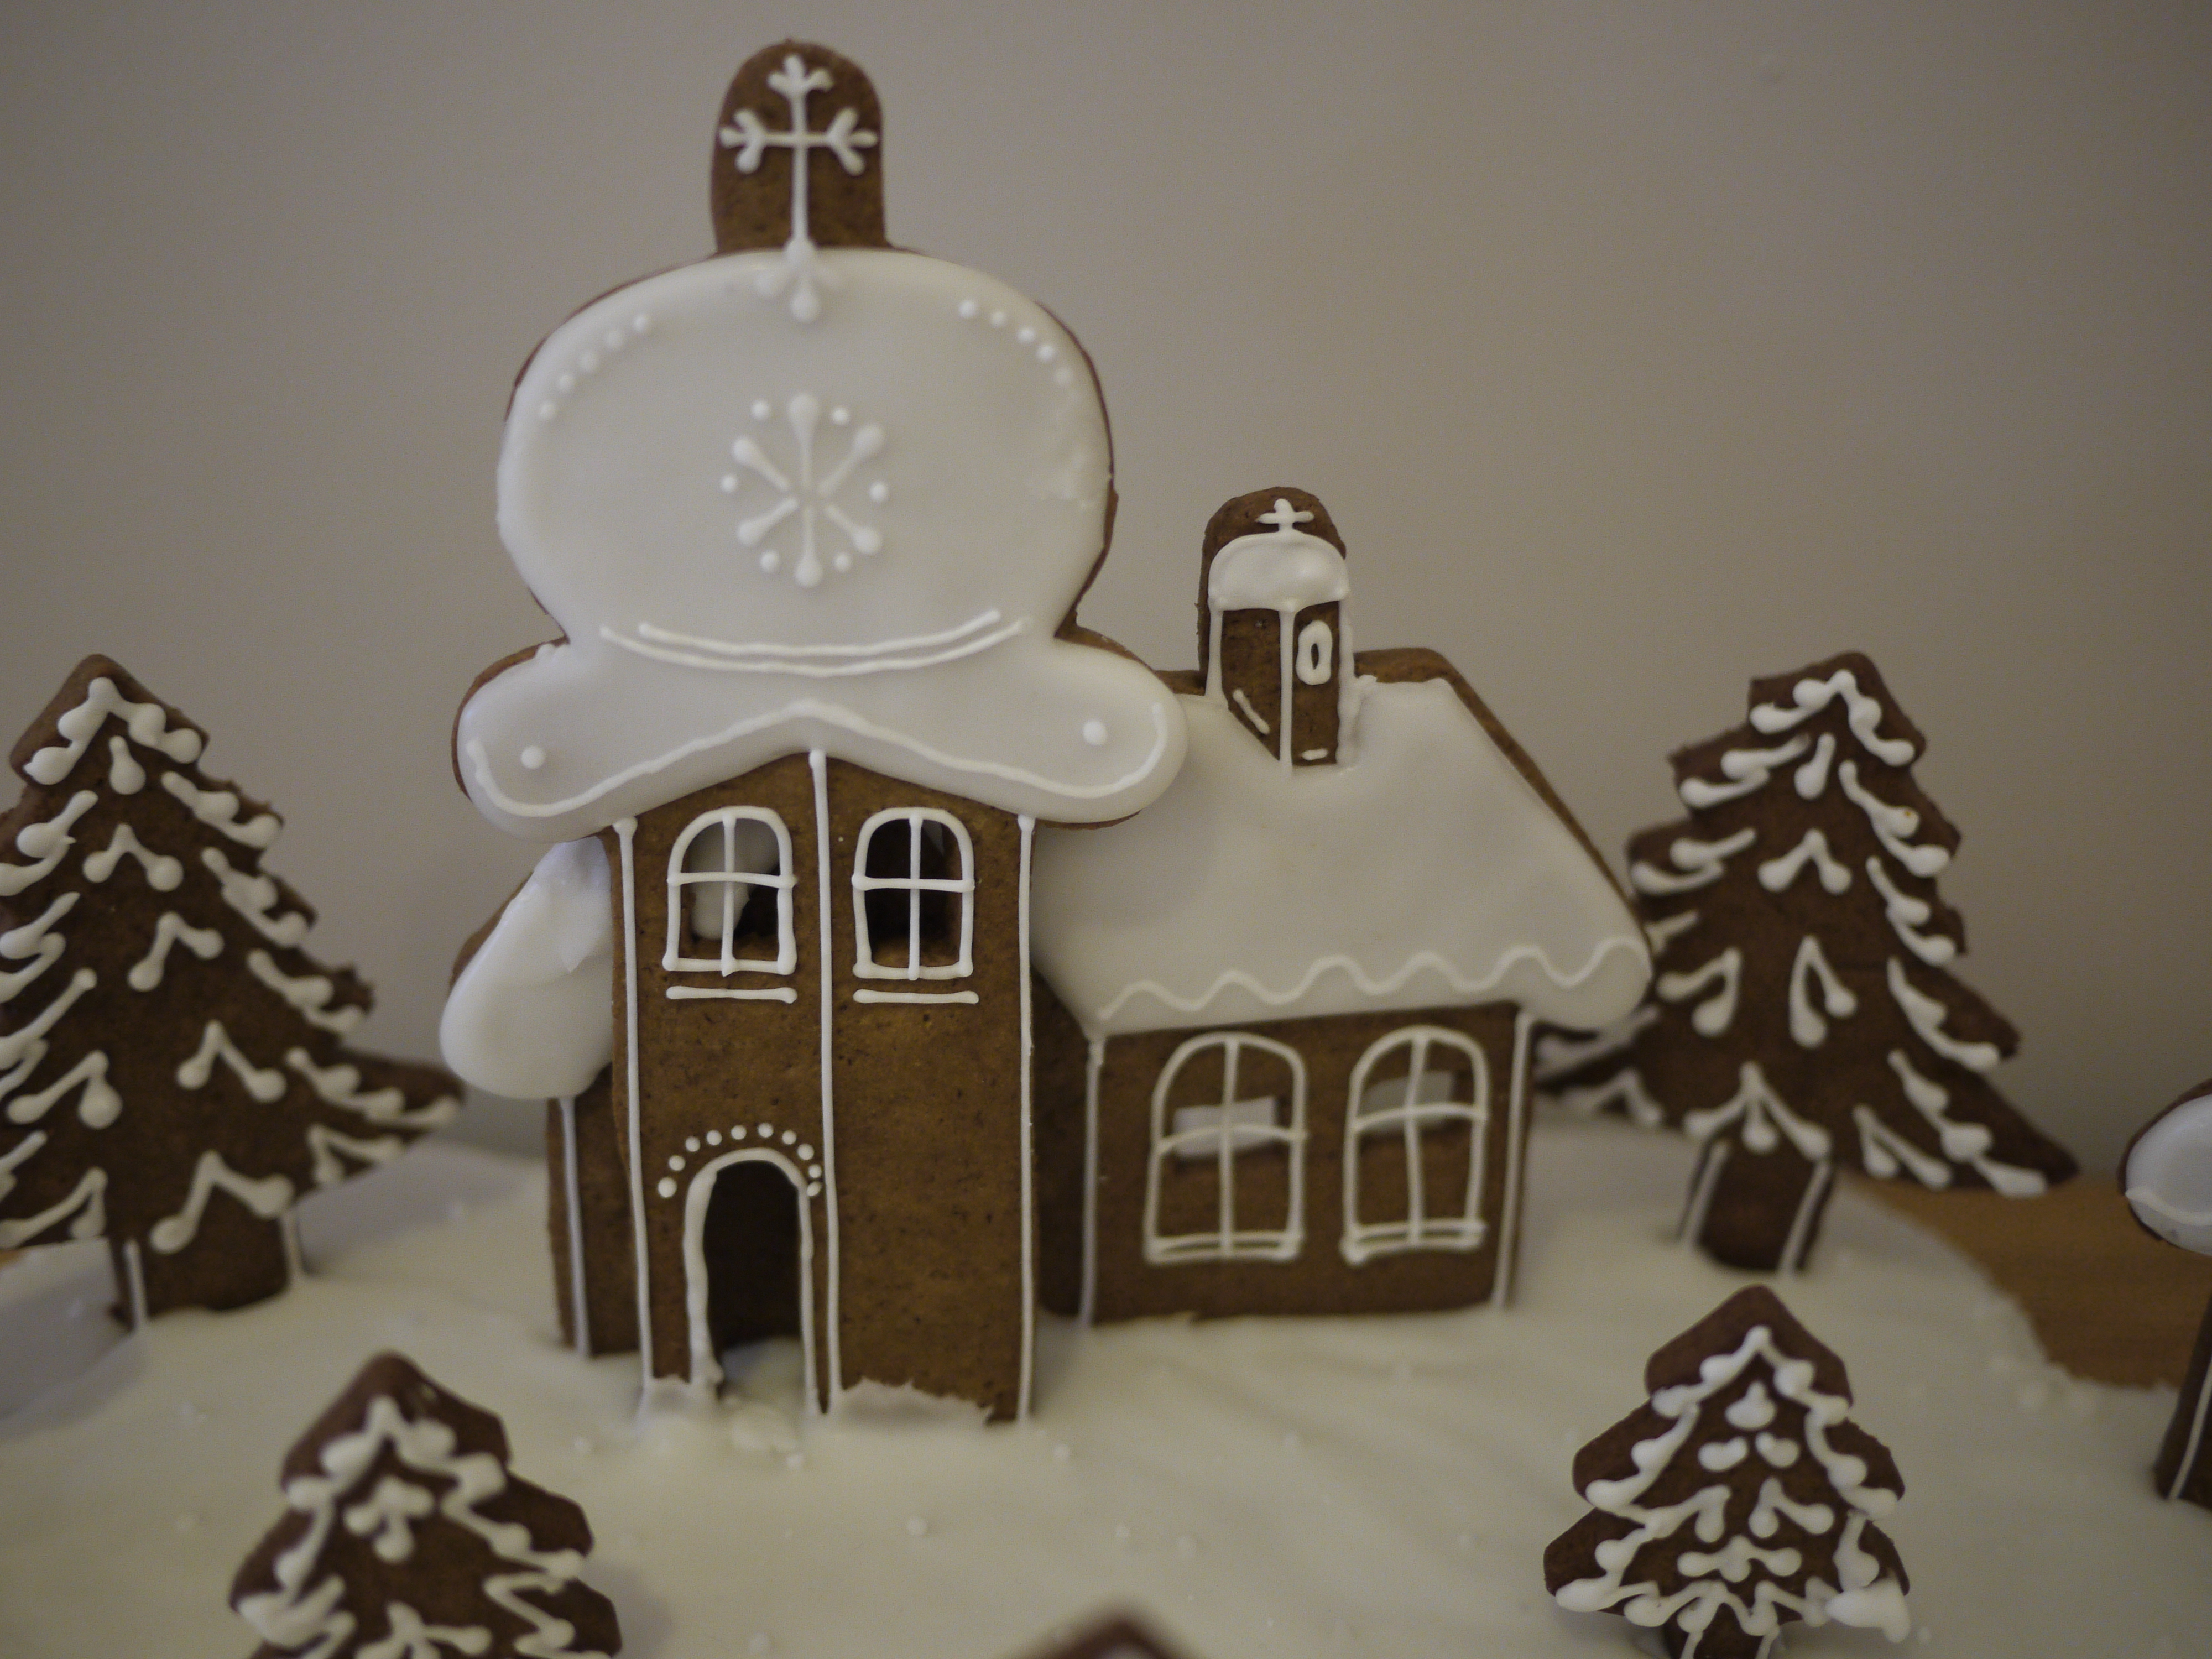
Once that had been done I added a bit more detail to the houses on top of the flooded icing and let that dry too. Next I used a combination of lumps of fondant and royal icing to secure the houses in place and left them to harden. Then the whole base was filled with flooding icing. Make sure you have a large piping bag filled so that you don’t have to stop half way through to make more, otherwise it will start to dry out and you’ll end up with a join line.
Once the base had dried out and all the final details had been piped onto the base, it was finally time to complete my magical gingerbread village by lighting the tea lights.


Leave a comment