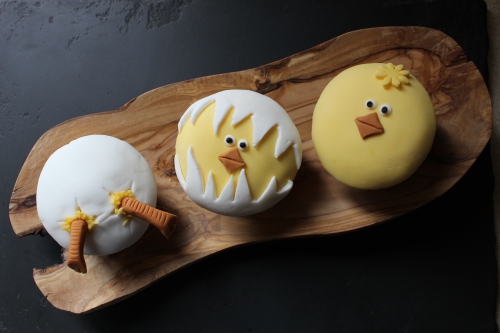
 I have so many things to blog about that I struggled to decide which one to start with. After the lovely spring weather this weekend though I though it would be appropriate to blog about these little hatching chick cupcakes first.
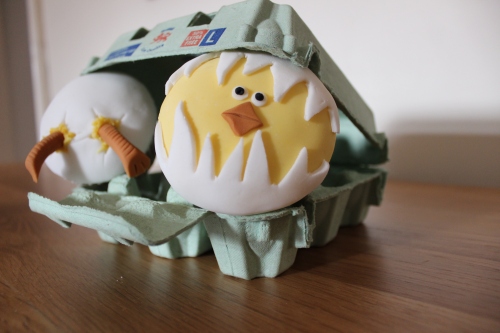 I made these a few of weeks ago for Tom to take to a hockey match with him. As usual though I completely underestimated how long they would take and so they weren’t quite finished when he wanted to leave. So I gave him a lift to the match, drove home to finish them off and then went back over at the end of the match to deliver them. One thing I learnt was that the plain chicks were the least popular – all the others got taken before anybody took a completely hatched chicken. That doesn’t mean I wouldn’t make them again – I think you need all three together.
 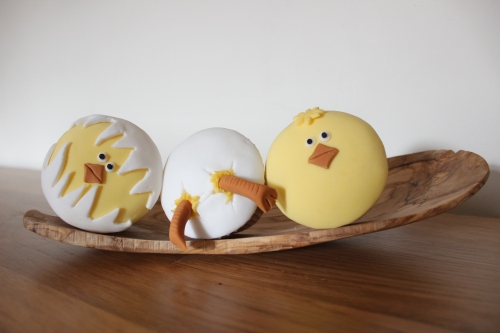 Although I ran out of time making them, it wasn’t because they were particularly complicated, or take ages. It was just that I only left myself about half an hour. That definitely wasn’t long enough. If you want to make your own set of hatching chick cupcakes, here’s how:
- Take a batch of 12 cupcakes (any flavour) and cover with buttercream to create a rounded top on each one. Leave to chill for a bit so that the buttercream hardens up a bit. If possible, try to save a bit of the buttercream and colour it yellow – place in a piping bag with a grass tip attached and save until later.
- Colour some fondant icing pale yellow, roll out until it is fairly thin and then cut out 8 circles (big enough to cover the top of each cupcake). Put these over the top of 8 of the cupcakes and smooth down to the top of the cupcake cases.
- Cut out 4 “flowers” (I used a small flower plunger) for the tufts of feathers and place one on the top in the middle of four of the cupcakes.
- Add a bit of red food colouring to the leftover yellow icing to make it orange. Roll out a small amount and cut out 8 small squares. Place one in the middle of each of the yellow cupcakes and using the back of the knife make an indent across the middle, diagonally, to create a beak.
- With the rest of the orange icing, divide it into quarters and roll each one out into a sausage shape. Pinch each end of the sausage and then cut toes into it. Using a knife, press lines all the way along the sausage shape and then cut in half to create a pair of legs. Leave these to harden for a bit.
- Take some white fondant icing and roll out thinly. Cut out 4 white circles. Use a small star cutter to cut out two holes from each one (where the legs will be poking out) and then smooth a circle on top of the four remaining cupcakes.
- Roll out the white icing again into a long rectangle and then, using a knife, cut it in half lengthways using zig-zags. Use the round cutter to cut out semi-circles with a zig-zag edge. You don’t want the two parts to create a whole circle when you put them together so make sure the zig-zag line is about a third of the way up the cookie cutter rather than in the middle.
- Brush the edges of the four yellow cupcakes, without the tufts of feathers on, with a bit of water and then stick the white semi-circles on.
- Roll 16 small balls of white icing and squash them to make small circles. Stick a pair to each cupcake just above the beak. Roll 16 smaller balls of black icing and stick to the middle of each of the white circles.
- Finally, using the piping bag filled with yellow buttercream, pipe a little bit into each of the cut out star shapes on the white cupcakes. Then push a leg into each one.

Leave a comment